




How to Glue PVC Irrigation Pipe: A 19-Step Installation Guide
A clean, properly solvent-welded PVC joint is one of the most reliable connections in irrigation. A rushed one is one of the most common sources of callbacks. The steps below apply to standard Schedule 40 and Class 200 PVC used in residential and light commercial irrigation systems.
19 Steps for a Sound PVC Joint
- Cut the pipe square. An angled cut creates an uneven mating surface and increases the risk of a poor seal.
- Remove burrs from both the inside and outside of the cut end. A deburring tool or utility knife works. Burrs can score the fitting socket or prevent full insertion.
- Clean the pipe with a dry rag. Remove dirt, moisture and debris from the area to be joined.
- Check the dry fit. The pipe should enter the fitting socket at least one-third of the way without force. If the fit is too tight, lightly sand the pipe. Do not create flat spots or gouges.
- Remove surface gloss from the pipe and fitting using cleaner, primer or fine-grit sandpaper. Bonding requires a chemically receptive surface.
- Apply solvent cement to the pipe using a full brush stroke. Use the applicator size matched to the pipe diameter.
- Apply a thinner coat of cement inside the fitting socket.
- Apply a second coat to the pipe.
- Keep the brush in the cement can between applications to prevent the applicator from drying out.
- Work quickly. Solvent cement begins to set fast. Do not apply too much — excess cement weakens the joint.
- Assemble immediately after the second coat on the pipe.
- Push the pipe fully into the fitting and rotate one-quarter turn while the cement is still wet. This distributes the cement evenly across the joint.
- Hold the assembly steady for approximately one minute. Movement during the initial set can compromise the joint.
- Get assistance on larger pipe sizes. Pipes 3 inches and more require enough force that require a second person or mechanical puller.
- Wipe off excess cement, especially the bead at the socket shoulder. Excess cement does not add strength and can attract scrutiny during inspection.
- Allow the joint to cure before handling or pressurizing. At 70°F or above: 30 minutes. At 40–60°F: 1 hour. At 20–40°F: 2 hours.
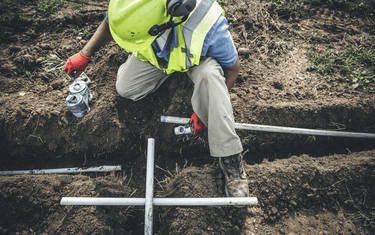
- Snake pipe in the trench from side to side rather than laying it straight. This allows for thermal expansion and contraction.
- Bed the pipe with fine soil. Use clean backfill without rocks or clods for the first few inches. Leave joints exposed for inspection.
- Observe the full set period before pressure testing. Twenty-four hours is the standard safe minimum, though set time varies by cement type, pipe size, temperature and joint fit.


