




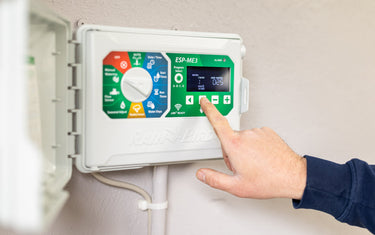
A rain sensor pauses an irrigation system when meaningful rain falls, preventing the controller from watering when it should not. It is one of the cheapest and most effective water-saving upgrades available, with installation costs typically $25-80 and a one-hour installation effort. The sensor connects to almost any existing residential irrigation controller using a pair of low-voltage wires. Here is the workflow.
What a Rain Sensor Does
A rain sensor monitors precipitation and prevents the irrigation controller from running zones when:
- Enough rain has fallen to make watering unnecessary
- The sensor remains saturated from recent rain
The sensor typically uses one of three detection methods:
- Disc Sensor A porous absorbent disc that expands when wet, completing or breaking a switch contact. When the disc dries, the contact returns to its original state. Adjustable thresholds typically allow setting at 1/8 inch to 1 inch of rain triggering the shut-off.
- Tipping Bucket A small cup that collects rain and tips when full, registering the rainfall amount electronically. More precise than disc sensors, but more expensive.
- Electronic/Wired Electronic sensors with various detection methods. Connect to the controller through a wired interface.
Wireless
Wireless versions of any of the above. Communicate to the controller via radio signal rather than wire. Useful when the sensor needs to be located far from the controller but require a compatible controller and have a battery to maintain.
For most residential applications, a disc-type wired sensor is the right choice. Inexpensive, reliable and easy to install.
Where to Mount the Sensor
The sensor must be:
- Exposed to actual rainfall (not under eaves, not under trees)
- Mounted at a reasonable height (typically 5-10 feet above grade)
- Accessible for inspection and battery replacement (for wireless models)
- Protected from physical damage from animals, debris, or maintenance equipment
Common mounting locations:
- On a fence post or fence rail
- On the side of the house above the gutter line
- On a dedicated mounting post installed for the purpose
- On a side wall away from the irrigation supply
The sensor should be in a location representative of the overall rainfall on the property, not in a location that consistently gets more or less rain than the watered areas.
What You Need
For a typical wired rain sensor installation:
- The sensor itself ($25-50 for a basic disc sensor)
- Mounting bracket or hardware (often included)
- Two wires from the sensor to the controller (typically 20-foot or 25-foot pre-attached wires; longer runs require an extension)
- Wire strippers
- Drill and bits for mounting
- Stainless steel screws or anchors appropriate for the mounting surface
For wireless sensors:
- The sensor and wireless interface
- Batteries
- Compatible controller
Step 1: Choose Sensor Type
For a basic installation:
- Wired disc sensor: simplest, most reliable for most applications
- Wireless disc sensor: same functionality but no wire run; requires compatible controller
- Tipping bucket: more precise but more expensive
- Smart-controller-integrated sensor: if the smart controller is already installed, the sensor connects directly through the controller's interface
Step 2: Plan the Wire Route
From the sensor location to the controller:
- Identify the shortest practical route
- Avoid running along structural elements that may be added or modified
- Route along existing utility paths if possible
- Plan for some slack at both ends
For outdoor wire runs, use 18-gauge two-conductor wire rated for outdoor use. Indoor low-voltage thermostat wire is not appropriate for outdoor exposure.
Step 3: Mount the Sensor
Mount the sensor per the manufacturer's instructions:
- Drill mounting holes
- Insert wall anchors if needed
- Attach the sensor bracket
- Mount the sensor body in the bracket
- Verify the sensor is plumb and oriented correctly per the manufacturer's specs
- Adjust the rainfall threshold per your preference (typically a small dial; 1/4 inch is a common default)
Step 4: Run the Wire
From the sensor to the controller:
- Connect the sensor's pre-attached wires to your extension wire if needed
- Splice with waterproof connectors at outdoor exposed joints
- Indoor splices can use standard wire nuts
- Secure the wire along the route with cable clips every 4-6 feet
- Avoid pinching or kinking the wire
Step 5: Connect to the Controller
The controller end of the connection varies by controller model:
Most Standard Controllers
Most residential controllers have a dedicated terminal pair for rain sensor input, labeled:
- Sensor or Rain Sensor input
- One terminal for the wire to the sensor
- One terminal for the return wire (often shared with a sensor common)
Wire the two sensor leads to the appropriate terminals. Verify the connection is solid.
Smart Controllers
Smart controllers may have:
- A dedicated wired sensor input
- A wireless sensor pairing option
- Both options
Follow the manufacturer's specific instructions for sensor connection.
Controllers Without a Dedicated Sensor Input
For older controllers without a sensor input, the sensor wires can be connected to the COM line:
- Disconnect the COM wire from the controller's COM terminal
- Connect the COM wire to one of the sensor's input terminals
- Connect the sensor's output terminal to the controller's COM terminal
This effectively places the sensor in series with the COM circuit. When the sensor opens (rain detected), the COM circuit opens and no zones can activate.
Verify this configuration works correctly with your specific controller before relying on it.
Step 6: Test the Connection
With the controller powered on:
Verify Normal Operation
Manually start a zone:
- The zone should activate normally when the sensor is dry
- The sensor should not interfere with normal operation
Test the Rain Sensor
Simulate rain:
- Wet the sensor disc with water from a spray bottle or hose
- Manually start a zone
- The zone should NOT activate (the sensor has opened the circuit)
If the zone activates when the sensor is wet, the wiring is incorrect. Recheck connections.
Verify the Reset
Allow the sensor to dry naturally or by removing water:
- The sensor should reset to allow zones to activate normally
- Verify zones operate after the sensor dries
Step 7: Configure the Controller
For controllers with rain sensor settings:
- Enable rain sensor input
- Set the rain delay duration (some controllers offer 24, 48 or 72-hour delays)
- Configure whether the sensor affects only watering or also other features
For smart controllers, configure the sensor through the app:
- Enable rain sensor monitoring
- Set threshold and timing preferences
- Verify the sensor status displays correctly in the app
Step 8: Verify Schedule Operation
Let the system run through one full schedule cycle:
- Verify zones run normally when the sensor is dry
- Note the next scheduled rainfall event (or simulate one)
- Confirm zones are paused when the sensor detects rain
- Confirm zones resume when the sensor dries
Maintenance
Rain sensors require minimal maintenance:
Annually
- Inspect the sensor for physical damage (bird damage, weather damage)
- Verify the disc moves freely (gently press to confirm it can flex)
- Replace the disc if it has degraded (typically every 5-7 years)
After Storms or Weather Events
- Verify the sensor still operates correctly
- Check that the disc is not stuck in a saturated position
Battery Replacement (Wireless)
For wireless sensors, replace batteries per the manufacturer's schedule (typically every 2-3 years).
Common Installation Mistakes
- Mounting the sensor under cover (eaves, trees) where it does not see rain
- Mounting too close to the ground where debris affects sensitivity
- Skipping the test step
- Using indoor wire for outdoor runs
- Not verifying the sensor opens the COM circuit on older controllers
- Forgetting to enable the sensor in the controller settings (some controllers default to ignoring the sensor input)
When a Rain Sensor Is Not Enough
For regions with significant rain variability, consider a more sophisticated approach:
- Smart controller with weather-based scheduling (incorporates forecast, not just current rain)
- Soil moisture sensor (monitors actual soil moisture, not just rainfall)
- Multiple rain sensors (for properties with large or varied terrain)
Next Step
Identify the mounting location first. The sensor only works if it sees actual rainfall, and the location is representative of the watered areas. With the mounting location selected, the installation is a methodical 60–90-minute project. The payback in water savings typically exceeds the installation cost within the first season.


