




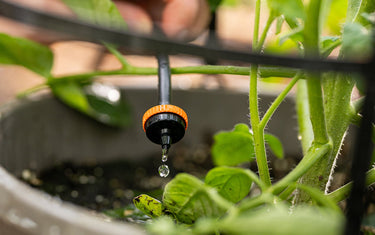
A drip irrigation system delivers water directly to plant roots at low flow rates. It is the most water-efficient irrigation method available, uses significantly less water than spray irrigation, and is one of the easier DIY irrigation projects. For garden beds and foundation plantings, a basic drip install takes a single afternoon, and the materials are inexpensive. Here is the workflow.
Why Drip for Beds
Drip irrigation makes sense for plant beds because:
- Water goes directly to roots, not to leaves or surrounding mulch
- Low pressure and slow application prevents runoff
- Foliage stays dry, reducing fungal disease risk
- Water consumption typically 30-50% lower than spray systems
- Each plant or plant cluster can be watered independently
- Easy to expand as plantings grow
For lawn areas, drip is not appropriate; lawns need broad coverage that drip cannot efficiently provide. Spray and rotor systems remain the right choice for turf.
What You Need
For a basic drip system serving foundation plantings or a garden bed:
Source Connection Components
- An outdoor spigot or irrigation zone with an open valve outlet
- A backflow preventer (if connecting directly to potable water)
- A pressure regulator (essential for drip operation)
- A filter (essential to prevent emitter clogs)
Distribution Components
- Mainline tubing: 1/2-inch polyethylene drip tubing
- Distribution tubing: 1/4-inch tubing for runs to individual emitters
- Connection fittings: tees, elbows, couplings, valves and end caps
Emitters
- Pressure-compensating emitters (1 GPH or 2 GPH typical for foundation plantings)
- Drip line with built-in inline emitters (for evenly spaced installations)
- Micro-sprayers and micro-jets for small zones
Tools
- A pipe punch or insert tool (for putting emitters into tubing)
- Scissors or pipe cutters
- Hand tools for fastening
Layout Planning
Before buying parts, sketch the bed:
- Identify each plant or plant cluster that needs water
- Group plants with similar water needs
- Identify a path for the mainline (typically along the bed edge)
- Identify branch paths to individual emitters or emitter clusters
For most foundation plantings, a single 1/2-inch mainline running along the bed length with 1/4-inch branches to individual plants is the basic structure.
Step 1: Connect to the Source
Three options:
Option A: Connect to an Outdoor Spigot
- Attach a backflow preventer to the spigot threads
- Attach a pressure regulator downstream of the backflow preventer
- Attach a filter downstream of the pressure regulator
- Connect 1/2-inch tubing from the filter outlet
- Use a hose-thread to tubing adapter for the connection
Option B: Tap into an Existing Irrigation Zone
Install a 1/2-inch tubing adapter at the outlet of an existing zone valve
Use existing filter and pressure regulator on the irrigation supply if appropriate
Connect tubing to the adapter
Option C: Direct from a Drip-Specific Zone
For systems with a dedicated drip valve:
- Install pressure regulator and filter at the valve outlet
- Connect mainline tubing
Step 2: Lay the Mainline
- Roll out the 1/2-inch tubing along the planned path
- Secure with tubing stakes every 4-6 feet
- Keep the tubing on the soil surface; cover with mulch later for both protection and aesthetic
The mainline is the trunk of the system. All distribution branches off from this line.
Step 3: Install Branch Lines and Emitters
For each plant or plant cluster that needs water:
Insert a Punch Hole in the Mainline
Use a pipe punch to make a small hole at the takeoff point. The punch is sized to match the inserts for branch tubing or emitters.
Insert the Branch or Emitter
For short distances:
- Push an emitter directly into the punch hole
- Position at the plant base or root zone
- For longer distances or multiple emitters:
- Push a 1/4-inch tubing connector into the punch hole
- Run 1/4-inch tubing to the plant
- Insert an emitter at the end of the 1/4-inch run
Choose Emitter Flow Rates
Match emitters to plant needs:
- Small annuals and perennials: 1 GPH
- Medium shrubs and grasses: 2 GPH
- Larger shrubs and small trees: 4 GPH or multiple 2 GPH emitters
- Trees: 4-8 GPH at the drip line (or multiple emitters around the canopy)
Pressure-compensating emitters maintain consistent flow regardless of distance from the source, which matters for runs over 50 feet or with significant elevation changes. Standard non-compensating emitters work for shorter, flat runs.
Step 4: Add End Caps and Flush Points
At the end of every line:
- Install an end cap, flush valve or end-line emitter
- For systems where flushing matters (most), choose a flush-able end cap that allows occasional cleaning
Step 5: Pressurize and Test
Open the supply valve. Walk the system:
- Verify emitters are dripping at the expected rate
- Look for leaks at connections
- Check that pressure is at the design value (typically 20-30 PSI for drip)
- Verify the filter is not clogging immediately (suggests upstream debris)
If any emitter is not flowing or is flowing too much, address that emitter specifically (re-seat in the punch hole, replace if defective).
Step 6: Bury or Cover the Tubing
For aesthetic and protection:
- Cover the mainline tubing with 1-2 inches of mulch
- Bury 1/4-inch branch lines under mulch as well
- Avoid burying tubing in dense soil that holds heat and pressure on the tubing
Do not bury tubing more than 1-2 inches; deeper burial complicates future inspection and repair.
Step 7: Set the Schedule
For drip systems:
- Frequency: 2-3 times per week is typical for established plantings; 4-5 times for newly planted material
- Duration: 30-60 minutes per cycle typical for 1 GPH emitters; calibrate based on plant condition
- Best time: early morning (5-7 AM) for water absorption before heat
For smart controllers, configure the drip zone with drip-specific settings (precipitation rate of 0.1-0.5 inches per hour), so the controller calculates appropriate run times.
Maintenance
Drip systems require regular attention:
Monthly During Active Season
- Walk the system and verify emitters are flowing
- Check the filter for debris; flush if needed
- Look for visible leaks or damaged tubing
Annually
- Flush the mainline by opening end caps and running for 1-2 minutes
- Replace filter screen if visibly damaged
- Inspect and replace clogged emitters
- Check pressure regulator output with a gauge
Seasonal
- Winterize the system before first freeze (drain or shut off and drain)
- Spring startup includes a full system check before regular operation
Common Drip Installation Mistakes
- Skipping the filter and pressure regulator (causes emitter clogs and tubing failures)
- Using wrong emitter flow rates for plant size
- Burying tubing too deeply (makes service difficult)
- Running tubing over hot surfaces (causes thermal damage)
- Not flushing the system before initial operation (introduces debris into emitters)
- Mixing emitter types within a single zone without considering balance
When Drip Is Not the Right Choice
Drip is wrong for:
- Large turf areas (use spray or rotors)
- High-pressure systems without regulators (will damage tubing)
- Plants that benefit from foliar wetting (some xerics, some succulents)
- Sites with very hard water without filtration (high clog risk)
- Areas with heavy foot traffic or vehicle traffic (tubing damages easily)
Tools You Will Reuse
- The drip installation tools are worth owning:
- Punch tool ($10-20)
- 1/4-inch tubing connector kit ($15-30)
- Filter and regulator combo ($30-60)
- Hose-to-tubing adapter ($10-20)
Once the basic kit is in place, expanding the system or adding zones is a matter of pipe and emitters.
Next Step
Walk the bed with the plant list in hand. Plan the mainline route and identify each plant's emitter need. With the layout sketched, the install is a methodical 3–4-hour project for a typical foundation planting bed. The water savings and improved plant health pay back the investment within one season for most properties.


