




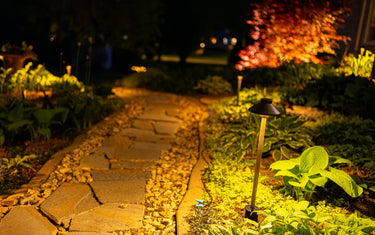
Contrast, layering and placement determine whether a lighting system looks intentional after dark. Here is how to think through each one before you install.
Landscape lighting is unlike most other outdoor purchases. You cannot fully evaluate the result until after dark, with the fixtures installed and positioned. A fixture that looks right in daylight may produce a beam that hits the wrong surface, creates unwanted glare or leaves a coverage gap that was not apparent during planning.
This makes the design decisions that happen before installation more consequential than they might seem. Understanding how contrast, layering and placement work — and what common problems look like — produces a system that performs as intended from the first night it runs.
Contrast Over Brightness
The most common mistake in residential landscape lighting is applying too much of it uniformly. When every surface is lit at the same level, the result reads as flat rather than designed. The eye has nowhere to travel because everything is equally visible.
Good lighting is built on contrast. Focal points are bright. Transitions are lit for navigation and safety. Background areas remain in relative shadow, which makes the lit elements more prominent by comparison. The goal is not maximum visibility across the entire space — it is intentional emphasis on specific elements, with darker areas providing the contrast that makes those elements read.
A restrained system with deliberate focal points consistently looks more considered than a system with twice the fixture count applied without a clear hierarchy.
Layering: Why One Fixture Type Is Not Enough
A system built from a single fixture type — all path lights, or all spotlights — produces a one-dimensional result. Each fixture category does a different job, and the combination of categories is what creates depth.
Path lights and step lights work at grade level. They mark transitions, define edges and provide the ambient fill that makes a space feel navigable after dark.
Accent lights — positioned to illuminate planting beds, ground cover and low landscape features — add the middle layer. They connect the grade-level lighting to the focal elements above.
Spotlights and flood lights direct concentrated beams at specific targets: a specimen tree, a garden focal point, an architectural feature. These anchor the design visually and give the eye something to move toward.
A complete system uses all three layers. The proportions vary by site, but the structure is consistent: grade-level navigation, mid-level fill and deliberate focal points.
Placement Matters More Than Fixture Count
Three well-placed fixtures accomplish more than ten positioned without clear intent. Placement decisions determine what the system reveals, what it leaves in shadow and how the space reads as a whole after dark.
Think through each fixture location in terms of what it is illuminating and from what angle. An up-light at the base of a tree reveals trunk structure and canopy depth. A path light positioned in the center of a bed illuminates nothing usefully — the same fixture placed at the bed edge marks the boundary clearly.
Beam direction is as important as position. Most adjustable fixtures allow the beam angle to be set during installation. Set beam direction with the fixture lit and in position before securing it permanently.
Evaluating a Layout Before You Commit
Because landscape lighting only exists after dark, the most reliable way to evaluate a planned layout is to walk the space at night before installation is finalized. Temporary placement with the transformer running gives a working picture of coverage, contrast and gaps that no daytime walkthrough can replicate.
Look for dark transitions between lit zones — a path that moves from a lit section into darkness and then into another lit section has a coverage gap that will feel unsafe to navigate. Look for glare from fixtures aimed toward common viewing angles. Look for over-lit zones where multiple fixtures illuminate the same area without a clear focal intent.
Adjustments made during temporary placement cost nothing beyond repositioning time. The same adjustments after permanent installation require reburying wire and resetting fixture stakes.
The Nighttime Walkthrough
Before specifying any fixtures, walk the property after dark. This reveals actual light conditions — where existing ambient light from streetlights, neighboring properties or the house itself already contributes, and where genuine darkness creates safety or navigability concerns.
Areas that feel comfortable with existing ambient light do not need heavy illumination. Areas where the walkthrough reveals a genuine hazard or complete darkness are the priority zones for the system. This approach focuses the design on what the space actually needs rather than what looks comprehensive on paper.


