


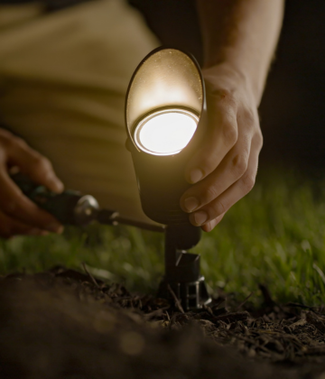

One dark fixture in an otherwise working landscape lighting run is rarely a sign that the fixture itself is dead. Most of the time the fault is in the bulb, the socket, the connection at the fixture, or the lead wire splice. Replacing the whole fixture should be your last move, not your first. Work through these five checks first. The repair usually takes less than 15 minutes and costs less than a new fixture.
Setup: Tools and Approach
Before you start, gather:
- A spare bulb known to work (an MR16 LED or halogen of the appropriate wattage)
- A digital multimeter with AC voltage function
- A small flat-head screwdriver
- A new waterproof wire connector or two, just in case
Work during daylight if possible. You need to see what you are doing inside the fixture.
Check 1: Swap the Bulb
The single most common cause of one dead fixture is one dead bulb. LED landscape bulbs are rated for tens of thousands of hours, but individual bulbs fail early sometimes, especially if they took a voltage spike or had a manufacturing defect.
Pull the existing bulb. Inspect it for:
- Burn marks or discoloration on the housing
- A loose or rattling internal component (audible when shaken)
- Bent or broken pins (on MR16 bulbs)
Install the known-good test bulb. If the fixture lights up, the original bulb was the problem. Replace permanently with a matching bulb.
If the test bulb does not light, continue.
Check 2: Inspect the Socket
Look into the bulb socket. A failing socket shows one of three signs:
- Discolored or burned contact points
- Bent or pushed-in contact pins
- Corrosion on the contact surfaces
If the contacts look discolored or corroded, gently clean them with a small piece of fine-grit sandpaper or a contact cleaner spray rated for electrical work. Re-seat the test bulb and try again.
If the contacts look fine and the bulb still does not light, continue.
Check 3: Test Voltage at the Fixture
With the lights on, set your multimeter to AC voltage. Touch the leads to the two wires entering the fixture (or to the lead wire stubs coming from the fixture body if the connection is inside the housing).
What you should see:
- LED system: 10.8V to 14V is healthy
- Halogen system: 11V to 12.5V is healthy
- Reading near 0V: no power is reaching this fixture
- Reading under 10V on an LED system: voltage drop, not a fixture problem
If the meter reads 0V, the fault is upstream of the fixture. Move to the next check.
If the meter reads a healthy voltage and the bulb still does not light, the fault is inside the fixture itself - typically a failed internal lead wire or a broken socket. Replacement is justified at that point.
Check 4: Inspect the Lead Wire Splice
Most low-voltage path lights connect to the main run through a small splice at the base of the fixture. That splice is often the weak point. Common failure modes:
- Connector worked loose during a freeze-thaw cycle
- Water entered a non-waterproof connector
- Animal pulled the connector apart
- Connector was crimped on insulation rather than conductor and never made full contact
Locate the splice. It is usually 6-12 inches below the surface near the fixture stake. Pull it gently. If it comes apart easily, the connection has lost contact.
Cut back to fresh conductor on both wires. Strip approximately 5/8 inches of insulation. Twist the wires firmly together and install a new gel-filled or silicone-filled connector rated for direct burial. Re-test the fixture.
Check 5: Inspect the Fixture Stake or Housing
If the bulb is good, the socket is clean, voltage reads healthy at the lead wires, and the splice is solid, the issue is inside the fixture itself.
- Common internal fixture failures:
- Internal lead wire from the socket to the fixture base has corroded through
- Stake has worked loose and one of the internal lead wires has come disconnected
- Water has entered the fixture body and shorted internal contacts
Open the fixture by removing the top cap or the lens housing. Look for visible damage. A fixture with corroded internal wiring is not worth repairing; pull and replace.
Now Replace If Needed
If you have worked all five checks and the fixture still does not light, replacement is justified. Match the new fixture to the old one in:
- Bulb type and socket (MR16, G4, GU5.3, etc.)
- Voltage rating (12V low voltage)
- Lead wire length (long enough to reach the splice without strain)
- Style (path light, well light, spot, area)
If the old fixture is more than 10 years old and you have access, consider replacing the entire fixture rather than repairing it. Modern integrated LED fixtures often outlast and outperform the bulb-plus-fixture combinations they replace.
Quick Diagnostic Sheet
- Bulb swap: 60 seconds
- Socket inspection: 60 seconds
- Voltage read at fixture: 60 seconds
- Splice inspection and repair: 5-10 minutes
- Internal fixture inspection: 5 minutes
Total time investment before you have to commit to a new fixture: under 20 minutes.
Next Step
Start with the bulb swap. It rules out 50% of one-fixture failures in a minute. If the bulb is fine, voltage at the fixture tells you whether to look upstream (at the splice) or inside the fixture itself. Replacement is the last move, not the first.


